How to Make Cheese at Home
One of the world’s oldest and most beloved delicacies is cheese. Cheese has been a staple of human diets for thousands of years, ranging from basic handmade paneer to aged gourmet kinds. The good news is that it is not only feasible but also shockingly easy to make cheese at home. To begin, you don’t need pricey equipment or expert instruction. You can make wonderful, fresh cheese in your own kitchen with the correct materials, perseverance, and expertise.
This tutorial walks you through every stage of making cheese at home, starting with the fundamentals and explaining the science behind the process. This article will provide you with all the information you require, regardless of your level of experience or interest in handmade cuisine.
Understanding What Cheese Is:
Milk is separated into liquid whey and solid curds to make cheese. When milk proteins coagulate as a result of acids or enzymes, this process takes place. After that, the curds are formed, drained, and occasionally aged to create various kinds of cheese.
Fact: The same fundamental idea applies to all cheeses, whether they are fresh or aged, soft or hard. The ingredients, aging procedure, temperature, and timing all alter.
Ingredients Needed to Make Cheese:
You simply need a few basic materials to produce basic cheese at home:
Milk (full-fat, fresh milk works best)
Rennet or acid (vinegar, lemon juice, or rennet pills)
Salt (to preserve and add flavor)
Clean Water if diluting materials, use clean water.
Suggestion: Steer clear of ultra-pasteurized milk since it improperly forms curds.
Equipment Required:
Making cheese at home doesn’t require specialized equipment. Simple kitchen appliances are sufficient:
- Big, heavy-bottomed pot
- Thermometer (optional but advised)
- Muslin cloth or cheesecloth
- Colander or strainer
- A wooden spoon
- A bowl for collecting whey
Suggestion: Always sterilize your tools before beginning because cleanliness is crucial.
Step-by-Step Process: How to Make Cheese?

Step 1: Heat the Milk
- Transfer the milk into a big pot and warm it gradually over medium heat.
- To avoid scorching, carefully stir.
- For acid-based cheese, the milk should reach approximately 85–90°C (185–195°F).
- 32–35°C (90–95°F) if rennet is being used.
Suggestion: Avoid letting the milk boil because this could destroy the cheese’s texture.
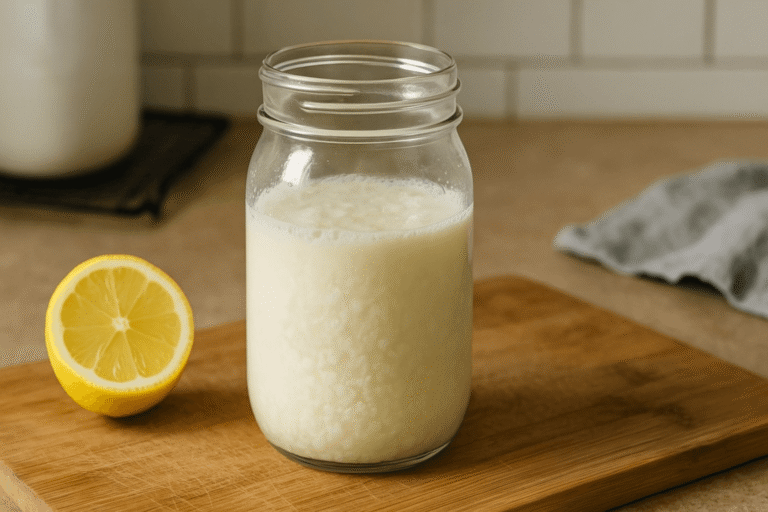
Step 2: Add Acid or Rennet
- Turn off the heat after the milk reaches the correct temperature.
- Add vinegar or lemon juice gently to fresh cheese.
- Rennet should be dissolved in water and added gradually to traditional cheese.
- After a few seconds of gentle stirring, stop.
Curds will start to form and separate from the whey in a matter of minutes.
Step 3: Let the Milk Set
- For ten to thirty minutes, leave the pot covered and undisturbed.
The curds will fully grow during this period. When the curds are stiff and the whey is clear or slightly yellow, it’s ready.
Step 4: Cut the Curds
- Cut the curds into tiny cubes with a clean knife.
- This helps regulate moisture content and releases more whey.
Fact: Larger curds produce softer cheese, and smaller curds produce tougher cheese.
Step 5: Drain the Whey
- Cover a bowl with a colander lined with cheesecloth.
- Fill it with the whey and curds. Let the liquid whey drain on its own.
Suggestion: The whey can be saved for baking, smoothies, and soups.
Step 6: Shape and Press the Cheese
- After gathering the cloth, gently squeeze out any extra liquid.
- Press the cheese for one to two hours with a weight on top for harder cheese.
The cheese gets firmer the longer you squeeze it.
Step 7: Add Salt
- Evenly distribute the salt once the cheese has formed. In addition to improving flavor, salt aids in cheese preservation.
Suggestion: You can rub salt on the surface or incorporate it directly into the curds.
Step 8: Rest or Age the Cheese
- For aged cheese, let it ripen over several weeks or months in a cold, controlled atmosphere.
You can consume fresh cheese right away. Different textures and flavors are produced by varying age durations.
Types of Cheese You Can Make at Home:
1. Fresh Cheese:
These cheeses are ready in a matter of hours and don’t need to be aged. Paneer, ricotta, cream cheese, and cottage cheese are a few examples.
2. Soft Cheese:
These are mildly flavored and have a creamy texture. They can need brief fermentation or aging.
3. Semi-Hard Cheese:
Pressing and minimal aging are necessary for these cheeses. They taste bolder and have a harder texture.
4. Hard Cheese:
Hard cheeses require rigorous temperature control and longer aging times. These are more difficult, but they are still doable with practice.
Common Mistakes to Avoid:
- Making use of ultra-pasteurized milk
- Heating the milk too much
- Too much stirring
- Ignoring hygiene
- Adding too much acid all at once
Better texture and flavor are ensured by avoiding these errors.
Health Benefits of Homemade Cheese:
There are no artificial ingredients or preservatives in homemade cheese. It includes:
- Superior grade protein
- Calcium for healthy bones
- Good fats
- Bacteria that are beneficial (in fermented cheese)
Additionally, you can regulate the amount of salt, which makes it healthier than products from the shop.
Storage Tips for Homemade Cheese:

- Fresh cheese should be used within five to seven days after being refrigerated.
- Instead of using plastic, wrap the cheese with parchment paper.
- Aged cheese should be kept in ventilated containers.
- Prevent mold growth by avoiding moisture accumulation.
Flavor and freshness are maintained through proper storage.
Why Make Cheese at Home?
Making cheese at home is creative, economical, and satisfying. You can play around with textures, herbs, and flavors. More significantly, it introduces you to pleasurable and instructive traditional cooking methods.
You can create your own distinctive cheese and experiment with countless variations once you have mastered the fundamentals.
Which milk is best for making cheese?
The finest outcomes come from fresh full-fat milk.
Why didn’t my milk curdle?
Low acidity or ultra-pasteurized milk can stop curdling.
How long does cheese take to make?
It takes one to two hours to prepare fresh cheese.
Final Thoughts:
Making cheese at home is a joyful experience as well as a useful skill. You can make fresh, tasty cheese that is healthier and more gratifying than store-bought versions with just a few basic ingredients and kitchen tools.
At first, the procedure could appear complicated, but after you grasp the fundamentals, it becomes simple and pleasurable. You can experiment with flavors, maintain control over ingredients, and re-establish a connection with traditional cooking techniques when you make cheese at home. Starting at home is the ideal way to appreciate this age-old craft, whether you’re producing cheese for flavor, health, or creativity.